
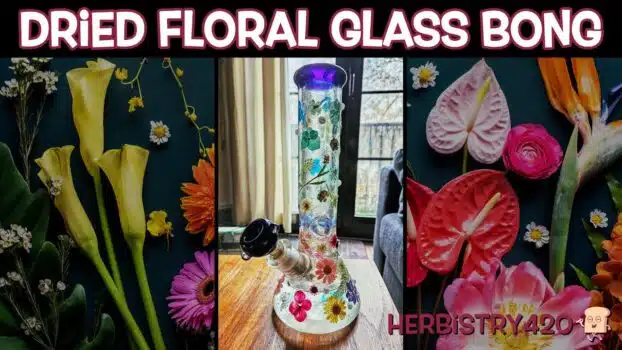


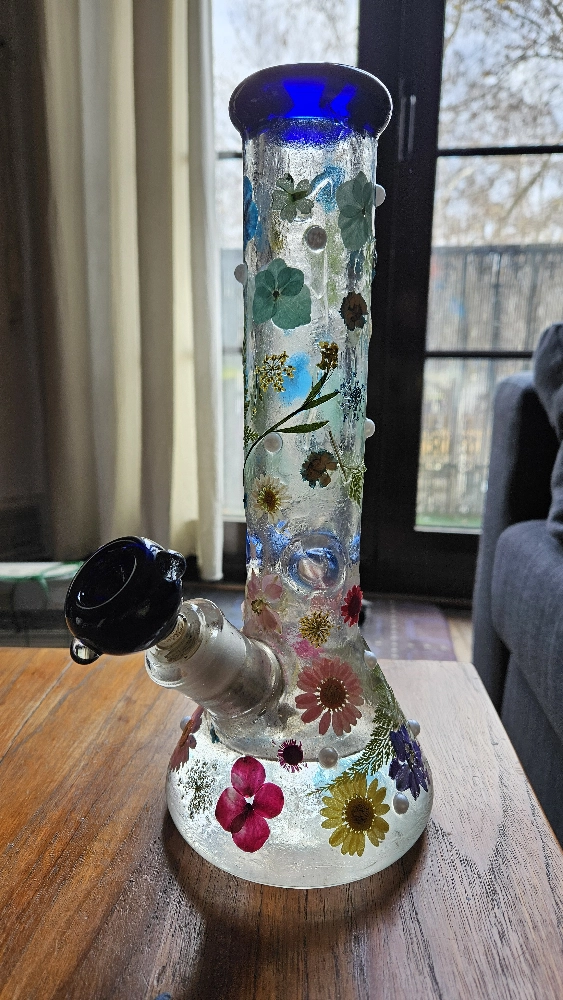
Want to turn a plain glass bong into a stunning piece of art? In this Herbistry420 CannaCrafts tutorial, host 40 shows you exactly how to add dried flowers to bong glass using UV resin — no professional tools required. The result is a beautiful floral bong that looks like it costs a fortune but can be made at home for under $30 in materials. This guide will walk you through every step to add dried flowers to bong surfaces safely and beautifully.
What You Need to Add Dried Flowers to Bong Glass
Before you start to add dried flowers to bong glass, gather all your materials. Here is everything you will need:
- UV resin — cures in minutes under a UV light (not the 24-hour wait of regular resin)
- Dried flowers — pre-dried and vacuum-packed sets from Amazon work great; blue, purple, and red varieties are available
- UV flashlight/lamp — needed to cure the resin quickly section by section
- Half-pearl beads — optional but add a beautiful decorative touch
- Disposable brushes — resin will ruin a good brush, use cheap disposables
- Painters tape — to protect the mouthpiece and downstem from resin
- Gloves — resin is toxic; always wear gloves when applying
- Isopropyl alcohol — to clean the bong surface before starting
- Super glue — helps hold stubborn flowers in place before resining over them
- Mod Podge Gloss Spray — final protective sealant over the finished piece
5 Steps to Add Dried Flowers to Bong Glass
Step 1: Prep the Glass Before You Add Dried Flowers to Bong
Clean the outside of the glass thoroughly with isopropyl alcohol and let it dry completely. Use painters tape to cover the mouthpiece — you do not want resin near where your lips go — and tape off the downstem so it can still be removed later. Proper prep is essential before you add dried flowers to bong surfaces. The mouthpiece and downstem areas should be fully covered.
Step 2: Apply a Base Coat of UV Resin
Using a disposable brush, apply a thin, even base coat of UV resin to the section where you want to add dried flowers to bong glass. Work in sections — start with the neck, then move to the beaker. The base coat helps flowers and pearls adhere properly. Watch out for brush hairs shedding into the resin and remove them with tweezers before curing. Keep the base coat tacky so the flowers will stick.
Step 3: Place Your Flowers and Pearls
While the base coat is still wet, use tweezers to gently place dried flowers and half-pearl beads onto the resin. This is the most creative step when you add dried flowers to bong glass — arrange them however you like, there is no wrong design. Press each flower gently to embed it into the resin. If a flower will not stay, use a tiny drop of super glue to hold it, then resin over it.
Step 4: Apply Top Coat and Cure with UV Light
Once all flowers and pearls are placed, apply another layer of UV resin over the top to seal everything. Move the UV flashlight slowly over each section for 2–3 minutes until the resin is fully cured and hard. Work section by section around the glass to ensure even coverage. Rotate the bong as you cure so all surfaces are reached by the UV light.
Step 5: Seal with Mod Podge Gloss Spray
Once all the resin is cured, give the entire decorated surface a final coat of Mod Podge Gloss Spray as a protective sealant. This adds durability and a beautiful finish to the completed add dried flowers to bong project. Let it dry fully before using. Remove the painters tape from the mouthpiece and downstem, and your floral bong is ready.
Tips for the Best Results
- Wear gloves throughout the entire process — UV resin is toxic before it cures
- Apply thin coats of resin rather than thick ones to avoid drips and uneven curing
- Avoid leaving cured resin in direct sunlight for extended periods — it can yellow over time
- Use good tweezers to place small flowers with precision
- Work in a ventilated space — resin fumes should not be inhaled
- Pre-dried vacuum-packed flowers from Amazon are the easiest option; DIY drying with silica gel is more time-consuming
Frequently Asked Questions
Is it safe to add dried flowers to bong glass with UV resin?
Yes — as long as you keep resin away from the mouthpiece and bowl. The only part that gets heat is the bowl, which is separate. When you add dried flowers to bong glass on the exterior body only, the cured UV resin stays stable and non-toxic. The key is never applying resin to surfaces that contact heat or your mouth.
What kind of flowers work best for this project?
Pre-dried, vacuum-packed flowers are the easiest to work with when you want to add dried flowers to bong glass. Sets with multiple colors — blue, purple, and red — look stunning. Make sure flowers are completely dry before applying resin, as any moisture can affect curing and adhesion.
How long does UV resin take to cure?
UV resin cures in approximately 2–3 minutes per section under a UV flashlight or lamp. This is much faster than regular epoxy resin, which can take 24 hours. Work in small sections and cure each one completely before moving to the next area of the glass.
References
Learn More on Herbistry420
Purchase Links
🛒 UV Resin – https://amzn.to/4bU1WmM
🛒 Dried Florals / Dried Flowers – https://amzn.to/3I9SHkZ
🛒 Mod Podge Spray (Acrylic Sealer Gloss) – https://amzn.to/48qhsEd
🛒 Mod Podge Ultra Spray Gloss – https://amzn.to/3ww8N5Q
🛒 UV Flashlight – https://amzn.to/4bPTdSI
🛒 UV Flashlight – https://amzn.to/49uIBa7
Support Herbistry420 by visiting our Cannabis Apparel Store, we have t-shirts, hoodies, pants, towels, you name it!
Note: Some links are affiliate links. Purchases through these links support the channel at no extra cost to you.
Add comment