
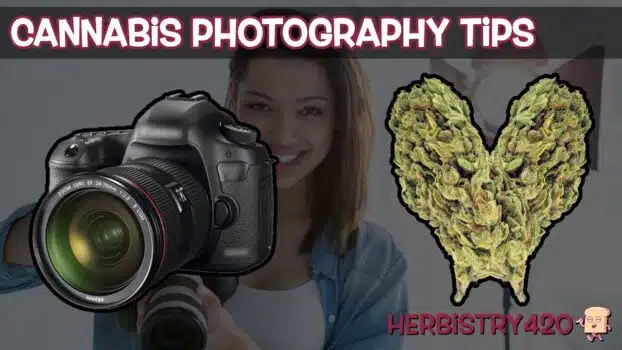


These cannabis macro photography tips walk you through focus stacking — the technique professional cannabis photographers use to get every trichome, pistil, and leaf perfectly sharp in a single image. Instead of one photo where only a sliver is in focus, focus stacking cannabis photography combines multiple exposures with slightly different focus points into one fully sharp result. You do not need a fancy studio setup, just a camera with manual focus, small LED lights, and Photoshop.
What Is Focus Stacking in Cannabis Macro Photography?
Macro photography has an unavoidable limitation: shallow depth of field. When you shoot close up, only a very thin slice of the image is in sharp focus at any given time. For weed macro photography tutorial work, this means a single shot will have sharp trichomes at the front while the rest of the bud goes soft. Focus stacking solves this by shooting the same subject multiple times — slightly adjusting the focus ring between each shot — and then blending those images together in Photoshop so every part is in focus at once.
What You Need for Cannabis Macro Photography
- A camera with manual mode (Canon, Nikon, Sony — any DSLR or mirrorless works)
- A macro lens with manual focus capability
- 2 small LED lights (Manfrotto-style compact LEDs are ideal)
- Adobe Photoshop (for the focus stacking tutorial Photoshop steps)
- Aurora HDR software (optional, for post-processing punch)
- Topaz Labs Denoise AI (optional, for cleaning up high-ISO noise)
5-Step Focus Stacking Cannabis Photography Guide
Follow these five steps for sharp, professional-looking cannabis macro photography:
Step 1 – Set up your camera in manual mode. Set your aperture as wide open as your macro lens allows — f/2.8 is ideal. Set shutter speed to 1/50 or 1/60. Raise ISO to 1600 or 3200 as needed for exposure. Most importantly, switch your lens to manual focus. If autofocus is enabled, the camera will shift focus between shots and ruin your stack.
Step 2 – Light your subject from the side. Position two small LED lights on either side of your cannabis subject. Side lighting brings out trichome texture and gives depth to the bud. Avoid backlit setups — having strong lights behind you (like video lights) will wash out the detail in your macro shots. Smaller, directional lights close to the subject give you the most control.
Step 3 – Shoot a focus stack series. Focus on the closest or furthest point of the bud. Take a photo. Then turn the focus ring the smallest amount possible toward the opposite end. Take another photo. Repeat until you have worked through the full depth of the subject — typically 6 to 12 shots depending on depth and aperture. Smaller focus ring movements between shots produce better blending results with fewer gaps.
Step 4 – Merge in Photoshop using Auto Blend Layers. Open Photoshop and go to File > Automate > Photomerge. Set it to Auto and uncheck Blend Images Together. Load all your stacked images and click OK. Once loaded, select all layers in the Layers palette (click the first, then Shift-click the last). Go to Edit > Auto Blend Layers, choose Stacked Images, check both options, and click OK. Photoshop builds a blended composite with sharp areas from each frame combined into one image. Delete unused layers and flatten when satisfied.
Step 5 – Post-process for impact. Export your stacked image as a TIFF. Open in Aurora HDR and apply the Vivid preset for richer contrast and colour. Return to Photoshop and use Curves adjustment layers — one brightening the centre buds with a feathered elliptical mask, one darkening the edges for drama. For colour effects, add a new layer, paint over the buds in any colour, and set that layer to Color blending mode at 15 to 35 percent opacity. This is how you create the purple or rainbow bud effect you see in cannabis photography. Finally, run Topaz Labs Denoise AI to clean up any high-ISO grain.
Cannabis Macro Photography Tips: Common Mistakes to Avoid
- Moving the focus ring too much between shots — large jumps leave gaps in the stack that Photoshop cannot fill cleanly. Smaller movements, more shots.
- Using autofocus — it will override your manual focus between shots. Always switch to manual focus for focus stacking cannabis photography.
- Backlit setups — having your main video lights pointed at you while shooting the bud creates a backlit subject. Use dedicated side LED lights for the cannabis and keep the scene separate.
- Skipping the HDR step — the raw stacked image can look flat. Processing through Aurora HDR or Photoshop Curves dramatically improves the final look.
Frequently Asked Questions
Do I need an expensive camera for cannabis macro photography?
No. Any DSLR or mirrorless camera with manual mode and a macro lens can do focus stacking cannabis photography. Canon, Nikon, Sony — the brand does not matter. What matters is the ability to set manual focus, aperture, ISO, and shutter speed independently.
How many photos do I need for a focus stack?
For most cannabis buds, 6 to 12 shots is sufficient. Deeper subjects or very high magnification may require more. The key is making small, consistent focus ring adjustments between frames so the in-focus zone shifts gradually rather than jumping.
Can I do focus stacking without Photoshop?
Yes. Several free and paid alternatives exist: Helicon Focus, Zerene Stacker, and even some free options in the open-source community. The focus stacking tutorial Photoshop method described here works well but is not the only option. Helicon Focus is widely used by professional product and macro photographers.
What aperture is best for cannabis macro photography tips?
Use the widest aperture your macro lens allows (lowest f-number, such as f/2.8). A wide aperture gives a shallow depth of field which is what makes focus stacking necessary — and also produces that beautiful creamy background blur in the final stacked image.
References
Learn More on Herbistry420
Purchase Links
🛒 Canon 5D Mark IV – https://amzn.to/3P58qUS
🛒 Canon 100mm Macro F2.8 L Lens – https://amzn.to/3F90GNe
🛒 Manfrotto Lumimuse 8 On-Camera Led Light – https://amzn.to/3h3rKoW
🛒 Manfrotto Befree GT XPRO Carbon Fiber Travel Tripod – https://amzn.to/3Y4AP1q
🛒 Black Muslin Backdrop Background for Photo Studio – https://amzn.to/3hbWsfA
Support Herbistry420 by visiting our Cannabis Apparel Store, we have t-shirts, hoodies, pants, towels, you name it!
Note: Some links are affiliate links. Purchases through these links support the channel at no extra cost to you.
Add comment