
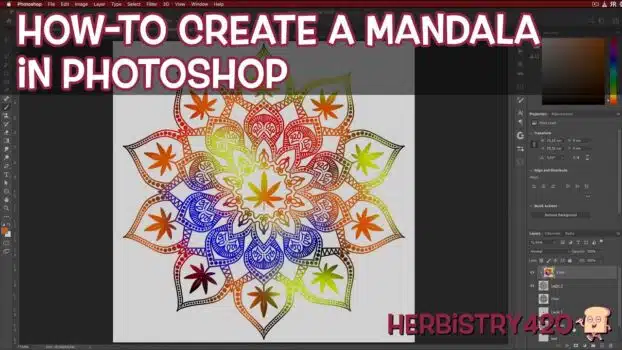


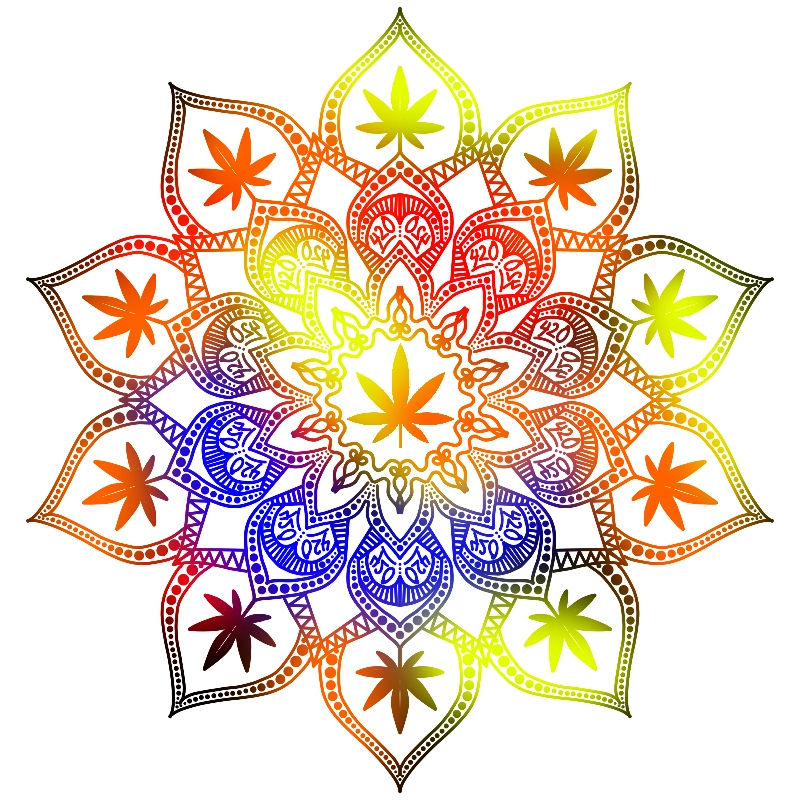
Here is how to make a cannabis mandala in Photoshop — no drawing skill required. Photoshop has a built-in Mandala symmetry brush that automatically mirrors every stroke you make across multiple segments at once. Set your canvas to 8×8 inches, paste in a cannabis leaf reference, enable the Mandala symmetry mode, and start drawing. This weed art tutorial takes about 20 minutes from a blank canvas to a finished, print-ready cannabis mandala art piece you can hang on your wall or share online.
What You Need to Create a Cannabis Mandala
- Adobe Photoshop (any recent version with symmetry brush support)
- Mouse or Wacom tablet (a regular mouse works perfectly fine)
- A simple cannabis leaf image — black/white line art from Google Images works well
5 Steps: How to Make a Cannabis Mandala in Photoshop
Step 1: Set Up an 8×8 Inch Canvas
Go to File → New. Change the units dropdown from pixels to Inches, set dimensions to 8 × 8 inches, and resolution to 300 pixels per inch. Click OK. This gives you a print-ready canvas for your cannabis mandala art — the 300 ppi resolution means you can print it cleanly on standard 8.5×11 paper. Press B to select the brush tool. You need the brush active before you can access the symmetry options.
Step 2: Enable the Mandala in Photoshop Symmetry Mode
With the brush tool selected, look for the symmetry butterfly icon in the top options bar. Click it and choose Mandala. Set the segment count to 10 — this matches the cannabis leaf shape naturally and produces a balanced result. Click OK. Pink symmetry guides divide your canvas into 10 equal segments. Anything you draw in one segment mirrors instantly in all others. That is the core power of a mandala in Photoshop. Press Cmd+0 to fit the canvas to your view. Hold Option and drag a corner of the guide box to scale it from the center, then press Enter to commit.
Step 3: Import and Position the Cannabis Leaf Reference
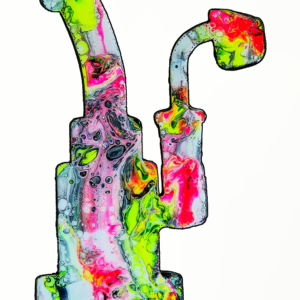
Open a simple cannabis leaf image in Photoshop. Press W (Magic Wand, tolerance 15) and click the white background to select it. Press Cmd+Shift+I to invert the selection so the leaf is selected instead. Press Cmd+C to copy it, switch back to your mandala canvas, and press Cmd+V to paste. Press Cmd+T to transform, then hold Option and drag a corner to resize from the center. Scale the leaf so it fits naturally within one segment of your symmetry grid. Name this layer “leaf.” This is a reference guide only — you will draw over it, not use it as the final cannabis mandala art. Enable Smart Guides (View → Show → Smart Guides) to help align to the center.
Step 4: Draw Your Cannabis Mandala Art on a New Layer
Create a new layer above the leaf reference and name it “mandala.” Select the brush tool, set smoothing to 40% for cleaner curves (higher smoothing = smoother strokes but more catch-up lag). Use the bracket keys [ ] to change brush size. Start drawing slowly — outline the leaf shape first, then add inner details, petals, and decorative dots. The mandala in Photoshop symmetry mode mirrors every stroke across all 10 segments in real time, so even simple lines create complex, symmetrical cannabis mandala art. Press Shift+click for straight lines between two points. Press Cmd+Z to undo any stroke you dislike. The paint bucket does not respect symmetry, so fill shapes by painting with the brush.
Step 5: Add Color with a Clipping Mask
Once you are happy with the line art, create a new layer above the mandala layer and name it “color.” Turn off the symmetry guide (click the butterfly icon → Symmetry Off). Use a large, soft brush (hardness 0, size 300–500px) to paint blobs of red, blue, yellow, and orange over the entire canvas. Then right-click the color layer and choose Create Clipping Mask. The color now only appears where the mandala artwork below exists — giving you a vibrant, stained-glass cannabis mandala art effect. Delete the leaf reference layer. That completes this weed art tutorial. Export as PNG and your piece is print-ready.
How to Make a Cannabis Mandala Look More Professional
The biggest upgrade you can make when you create a cannabis mandala is to use multiple layers — one for each major design ring or element. Mistakes on a single layer can be erased without affecting the rest of the piece. Use circular selection guides (Elliptical Marquee + Option+Shift drag from center) as alignment references for concentric rings of your cannabis mandala art. These circles get deleted before export. The longer you spend in Step 4 adding details, the more impressive the result — even simple dot patterns added around the outer edge of the mandala in Photoshop dramatically improve the finished look. This weed art tutorial is designed for beginners, but the technique scales to any complexity level.
Frequently Asked Questions
Do I need a drawing tablet to make a cannabis mandala?
No. A regular mouse works fine. A Wacom tablet can actually introduce lag in screen recording setups, so a mouse may give cleaner results for beginners. The mandala in Photoshop symmetry mode does the heavy lifting — precision is not critical when every stroke mirrors across all segments automatically.
How many segments should I use to create a cannabis mandala?
10 segments is the ideal starting point — it mirrors the natural shape of a cannabis leaf and produces a visually balanced result. You can experiment with 6, 8, or 12 segments for different cannabis mandala art styles. More segments mean smaller individual elements but more repetition in the pattern.
Can I print the finished cannabis mandala?
Yes. The 8×8 inch canvas at 300 ppi is fully print-ready. Export as PNG and print on standard 8.5×11 paper — the mandala fits cleanly with white borders. Great for framing, use as a coloring template, or sharing as cannabis mandala art on social media.
Is this weed art tutorial suitable for complete Photoshop beginners?
Yes. This weed art tutorial only requires basic knowledge of Photoshop — how to open a document, select a tool, and create new layers. Every step is explained from scratch. Fordee from Herbistry420 completed the demo mandala in about 20 minutes on his first attempt using this exact process.
References
Learn More on Herbistry420
Purchase Links
🛒 Link to Adobe Photoshop – https://www.adobe.com/products/photoshop.html
Support Herbistry420 by visiting our Cannabis Apparel Store, we have t-shirts, hoodies, pants, towels, you name it!
Note: Some links are affiliate links. Purchases through these links support the channel at no extra cost to you.
Add comment