
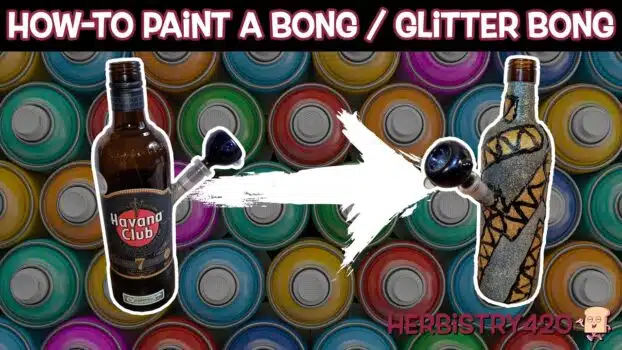


Learning how to paint a bong DIY is a satisfying weekend project that turns a plain piece into a one-of-a-kind custom piece. In this guide, we walk through the complete process of creating a custom glitter bong DIY project — from taping and spray painting to gluing glitter and sealing with acrylic varnish. No artistic experience required. Just patience, the right materials, and a little creativity.
Bong Painting Supplies and Materials
Before you start, gather all your bong painting supplies and materials:
- A plastic or glass bong (homemade or store-bought)
- Painter’s tape
- White spray paint (as base coat)
- Modge Podge, Tacky Glue, or similar craft glue
- Glitter in 2 colors (e.g., gold and multi-color silver)
- Acrylic varnish spray (synthetic works fine)
- Box cutter or X-Acto blade
- Paintbrush (for applying glue)
- White paper or parchment paper (to catch loose glitter)
- Scissors
How to Paint a Bong DIY: 5 Easy Glitter Steps
Step 1: Tape Off Protected Areas
Start by taping off the parts of the bong you do not want to paint. At minimum, tape the downstem opening and the mouthpiece — these are the parts that contact your hands, lips, and smoke path. Painter’s tape works perfectly for clean edges. For the downstem, wrap tape around the top portion of the stem, leaving the bottom open so it can still function. You do not need to tape off the base unless you want a clean, unpainted bottom.
Use a box cutter or X-Acto blade to trim the tape for precise edges. Always cut away from yourself — these blades are extremely sharp and slip easily on curved surfaces.
Step 2: Apply White Spray Paint as Base Coat
Take your bong outside and apply 1 to 2 coats of white spray paint as the base layer. White helps glitter colors pop more vividly — gold glitter on white looks much richer than gold on bare glass or plastic. Spray in even passes, keeping the can 8 to 12 inches away. Let the paint dry completely before moving to the next step (at least a few hours).
Tip: If you plan to use mostly gold glitter, consider using gold spray paint as your base instead of white. This hides any gaps in glitter coverage and reduces imperfections.
Step 3: Create Your Glitter Design Pattern
To create a DIY bong spray paint and varnish glitter design with 2 colors, lay strips of painter’s tape randomly across the bong surface after the base coat dries. The tape-covered areas will be one color of glitter, and the exposed areas will be another color. There is no right or wrong way to lay the tape — organic, random patterns often look the most interesting.
Brush craft glue over the exposed (non-taped) areas of the bong. Work in sections and do not apply too thick a coat — a thin, even layer of glue is more effective than a heavy one. Place white paper underneath to catch falling glitter.
Step 4: Apply Glitter and Seal with Varnish
When you know how to paint a bong with glitter, the key is working in stages. Pour your first glitter color generously over the glued areas. Tap the bong against your paper to dislodge excess glitter and collect it for reuse. Let this sit for a few minutes, then take it outside and apply a coat of acrylic varnish spray to seal this first color.
While the varnish is still slightly tacky (not fully dry), peel back the tape strips to reveal the white base underneath. Removing tape while slightly wet gives cleaner lines than waiting for full dryness. Then apply glue to the newly revealed areas, add your second glitter color, let it sit, and apply another varnish coat. Wait at least 24 hours between varnish coats for best results.
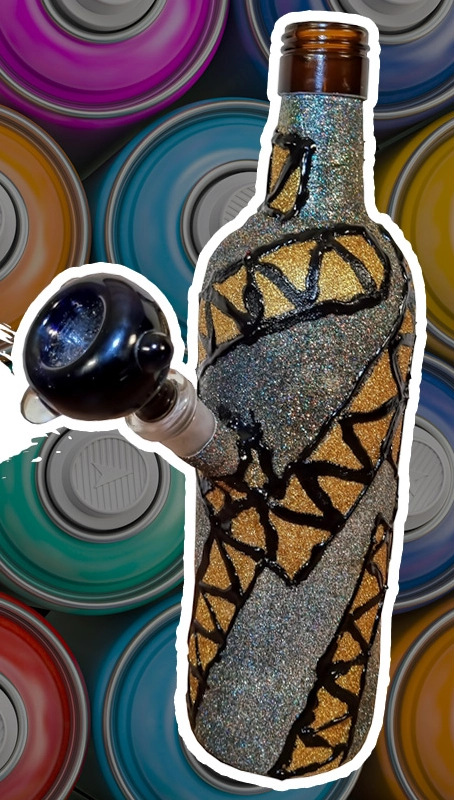
Step 5: Add Paint Details and Final Varnish
Once your glitter layers are sealed, you can add paint details for a custom glitter bong DIY project finish. A squeeze bottle of craft paint works well for drizzling thin lines, zigzags, or tribal patterns over the glitter. Black paint adds bold contrast on multi-color or gold glitter. Do not apply the paint too thick — it will look raised and textured as it dries, which can be intentional and adds grip to the piece.
After adding any paint details, apply 2 final coats of acrylic varnish (waiting 24 hours between each). The varnish locks everything in place permanently. Remove any remaining tape from the mouthpiece and downstem, and your custom painted bong is ready to use.
Tips for a Better DIY Painted Bong
- Use parchment paper when varnishing — if you rest the bong on regular paper while the varnish is wet, it may stick. Parchment paper prevents this.
- Water level is invisible after painting — a fully painted bong hides the water level. Mark the outside with a small piece of tape at the correct water height, or learn to gauge it by feel (no water reaching lips = right level).
- Two colors of glitter look better than one — the contrast between zones gives the bong visual depth and makes the design look intentional rather than uniform.
- Collect and reuse fallen glitter — always work over paper. Glitter is expensive and messy. Anything that falls off can be poured back into the container for future use.
- Varnish multiple times — one coat of varnish is not enough to fully protect glitter. 2 to 3 coats create a durable seal that prevents glitter loss during normal use and cleaning.
Frequently Asked Questions
Is it safe to paint a bong?
Yes, as long as you keep paint and varnish away from the mouthpiece, downstem, and any surfaces that contact smoke or your lips. The painted exterior of the bong never touches the smoke path, so there is no risk of inhaling paint fumes during use. Always tape off these critical areas before painting.
What type of paint is best for painting a bong?
Spray paint works best for an even base coat. Acrylic craft paint is ideal for details and accents. Always seal with acrylic varnish spray to protect the paint and glitter from moisture and handling. Avoid oil-based paints as they take longer to dry and can be trickier to work with on curved surfaces.
How do I keep the glitter from falling off?
Apply 2 to 3 coats of acrylic varnish spray over the finished glitter design. Each coat locks more glitter in place. Between coats, wait at least 24 hours for full curing. The varnish creates a clear protective shell that keeps glitter sealed even through repeated handling and occasional cleaning.
Can I paint a glass bong the same way as a plastic one?
Yes — the process for how to paint a bong DIY is essentially the same for glass and plastic. Glass may need a light scuff with fine sandpaper first to give the spray paint something to grip. Otherwise the tape, glue, glitter, and varnish steps are identical.
References
Learn More on Herbistry420
Purchase Links
🛒 Matte White Spray Paint – https://amzn.to/3IYRbTk
🛒 Acrylic Spray Varnish – https://amzn.to/3NcIGqh
🛒 Gold Glitter – https://amzn.to/43fqzWp
🛒 Holographic Glitter – https://amzn.to/3oGTtQn
Support Herbistry420 by visiting our Cannabis Apparel Store, we have t-shirts, hoodies, pants, towels, you name it!
Note: Some links are affiliate links. Purchases through these links support the channel at no extra cost to you.
Add comment