
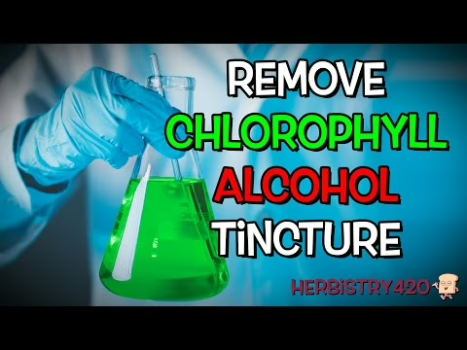


If you want to remove chlorophyll from tincture, you’ve come to the right place. After months of trial and error working with pulverized trim loaded with chlorophyll, fats, waxes, and lipids, Fordee finally cracked the code — and in this step-by-step guide, he walks you through the exact process to clarify your alcohol-based cannabis tincture on your very first try. No guesswork, no wasted material.
Why You Need to Remove Chlorophyll from Your Tincture
Ethanol is an incredible extraction medium — but it’s also nonbiased. It pulls THC, CBD, and all the good cannabinoids, but it also picks up fats, lipids, waxes, and chlorophyll — especially when you’re working with pulverized or damaged plant material. The result? A tincture that smells and tastes like fresh-cut grass, which makes it unusable for concentrates, edibles, or anything that requires a clean, refined product.
The good news: there’s a proven filtration process to remove chlorophyll from tincture using activated charcoal, diatomaceous earth, and a Buchner funnel setup. This technique doubles as a way to winterize cannabis tincture — stripping out fats and lipids at the same time. It’s the same principle used in professional QWET tincture chlorophyll removal, but totally DIY-able at home.
Equipment You Need for Cannabis Tincture Filtration
Here’s what Fordee used to get the job done. You don’t need a lab — just the right tools:
- Buchner Funnel Kit — fritted disc with side port for vacuum hose
- 70mm filter paper circles — custom-fit for the funnel (no more cutting coffee filters)
- Vacuum pump — oil-free preferred; taped connections work in a pinch
- Vacuum hose — connects pump to funnel
- Activated charcoal (food-grade) — the key ingredient to decolorize alcohol tincture
- Diatomaceous earth — creates the filter cake for micron-level cannabis tincture filtration
- Hot plate / magnetic stirrer — heats tincture to 80–90°F (do NOT use the magnetic stir function)
- Food grade ethanol (190 proof) — for priming the filter and making your tincture
- 1L Beaker — for holding and measuring
Step-by-Step: How to Remove Chlorophyll from Tincture
Step 1 — Add Activated Charcoal and Heat Your Tincture
For every 250 ml (~1 cup) of tincture, add 1 teaspoon of activated charcoal. Place it on your hot plate and bring the temperature up to 80–90°F. This is critical — the elevated temperature lets the charcoal absorb far more chlorophyll. Stir with a regular spoon (not the magnetic stir function — that doesn’t work). Stir every few minutes for at least 10 minutes total, at least 4–5 times.
Step 2 — Prime the Buchner Funnel and Build the Filter Cake
Drop a 70mm filter circle into the Buchner funnel’s fritted disc and wet it with a small amount of food-grade ethanol — this primes the filter and keeps it seated. Next, add 2 tablespoons of diatomaceous earth (for a 250 ml funnel). Pour a little ethanol over the DE to create a slurry, then connect the vacuum pump and pull it through. This builds your filter cake — a flat, even layer of DE that performs micron-level cannabis tincture filtration.
Step 3 — Filter the Tincture Through the Buchner Funnel
Pour your warm, charcoal-infused tincture directly into the funnel. Turn on the vacuum pump and watch the liquid get pulled through the filter cake. The resulting liquid should shift from dark green-black to a clear amber-yellow. This step is where you truly remove chlorophyll from tincture — the activated charcoal binds the chlorophyll and the filter cake captures it. Once the top layer looks dry and cracked, the filtration is complete.
Step 4 — Rinse and Recover Any Remaining Tincture
Pour a small amount of fresh ethanol over the filter cake after the main filtration — this pushes through any residual tincture trapped in the diatomaceous earth. Save any ethanol used for priming; it can be reused. When done, release the vacuum slowly — the pressure holds the top funnel in place and it needs a moment to equalize before you can lift it off.
Step 5 — Test for Chlorophyll with a UV Black Light
Want to confirm you’ve successfully removed chlorophyll? Grab a UV black light. Shine it on your tincture before and after filtering. Tincture with chlorophyll glows a deep burgundy-red under UV. After filtering, that red glow disappears — replaced by a dark green-brown tint. No more red = no more chlorophyll. This is the fastest way to green dragon tincture clarify confirmation without sending samples to a lab.
Important Tips and Warnings
- Never use isopropyl alcohol at any step. ISO contamination makes your tincture unsafe for oral consumption. Stick to food-grade ethanol exclusively.
- Don’t use the magnetic stir function — stir manually with a spoon. The magnetic stir bar doesn’t work well with activated charcoal.
- Each pass costs up to 20% yield — only run a second pass if necessary. Add fresh activated charcoal for each additional pass.
- Starting material matters — as Fordee puts it, “You can put lipstick on a turd, it’s still a turd.” Better starting material means better results. Pulverized trim will always extract more chlorophyll.
- Use an oil-free vacuum pump if possible. Oil-based pumps risk ethanol contamination and can seize.
Does This Work for QWET Tincture Chlorophyll Removal?
Yes — the same process applies whether you’re using QWET (quick wash ethanol extraction), a slow soak, or a machine extract. QWET tincture chlorophyll removal relies on the same activated charcoal + diatomaceous earth + vacuum filtration method. The key difference is that QWET methods generally produce less chlorophyll to start with (because of the cold, short wash), but if you’re still seeing green, this process will fix it.
FAQ: Removing Chlorophyll from Alcohol Tincture
How do I know if my tincture has too much chlorophyll?
Use a UV black light. Shine it on your tincture — if it glows dark red or burgundy, chlorophyll is present. You can also tell by smell and flavor: chlorophyll makes tinctures taste grassy and vegetal.
Can I remove chlorophyll from tincture without a vacuum pump?
You can use gravity filtration instead of vacuum, but it takes much longer and is less effective. A vacuum pump significantly speeds up the process and creates better compression of the filter cake for finer filtration.
Does removing chlorophyll reduce potency?
There is some yield loss — up to 20% per pass — because cannabinoids can get trapped in the filter cake. However, the potency per milliliter of remaining tincture stays roughly the same. You’re losing volume, not concentration.
What is the winterize cannabis tincture method?
Winterization involves chilling your tincture to very low temperatures (typically in a freezer) to cause fats, waxes, and lipids to precipitate out of solution, then filtering them away. The Buchner funnel method in this video removes chlorophyll and does a similar job of stripping fats and lipids without the freezer step — making it a faster alternative for cannabis tincture filtration.
How much diatomaceous earth should I use?
For a 250 ml Buchner funnel, use about 2 tablespoons. Aim for a 1/4 to 1/2 inch layer of DE after the slurry is pulled through. The DE filter cake is what gives you sub-micron filtration — don’t skip it.
References
Learn More on Herbistry420
Want to go deeper into cannabis extractions, tinctures, and edibles? Check out these categories on Herbistry420:
- Edibles — Cannabis cooking guides, infused recipes, and extraction tutorials
- Cannabis Testing — Reviews and guides on testing cannabis products and extracts
- Misc Videos — DIY cannabis projects and techniques
Purchase Links
- 🛒 Buchner Funnel Kit
- 🛒 Filter Circles (70mm)
- 🛒 Vacuum Pump (Oil Free)
- 🛒 Vacuum Hose
- 🛒 Activated Charcoal
- 🛒 Diatomaceous Earth
- 🛒 Hot Plate / Magnetic Stirrer
- 🛒 Food Grade Ethanol — 190 Proof
- 🛒 1L Beaker
Save 5% on your POT by Noids by using coupon code herbistry420
- 🛒 To pick up the POT by Noids please visit – https://bit.ly/4orC6Nf
Support Herbistry420 by visiting our Cannabis Apparel Store, we have t-shirts, hoodies, pants, towels, you name it!
Note: Some links are affiliate links. Purchases through these links support the channel at no extra cost to you.
Add comment